
How to Repair a Bose X (A10) control module down cable - Part 2
This is part 2 of our series covering the installation of the Bose X control module down cable. In this article, I will focus on the end of the cable that connects to the control module. If you need instructions on installing the end of the cable that connects to the microphone, see our January 2024 blog. As a refresher, the control module down cable is the headset mic cable that runs from the headset microphone to the audio control module.
Replacing the down cable on a Bose X is a relatively easy process that can be accomplished within 10-15 minutes. All you need is a standard screwdriver and a replacement down cable.
We can also perform this installation for you. To get started with our headset repair service, click HERE.
Step 1: Detach the old down cable
As mentioned in the previous blog post, the first step is to remove the cable assembly from the headset. See our detailed guide posted in our January 2023 blog here.
Step 2: Remove retainer ring
To begin the process remove the retainer ring, and remove the battery cover.
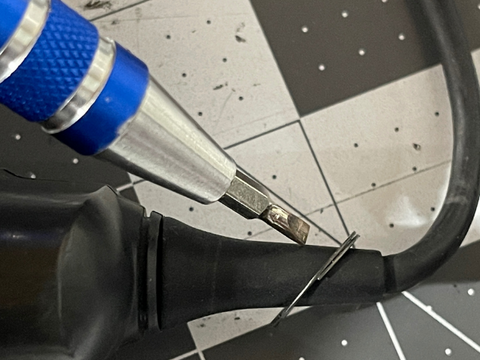

Step 3: Remove the old down cable
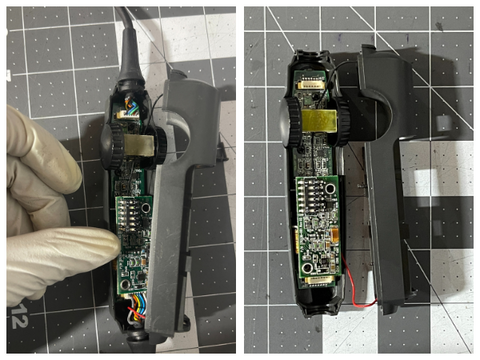
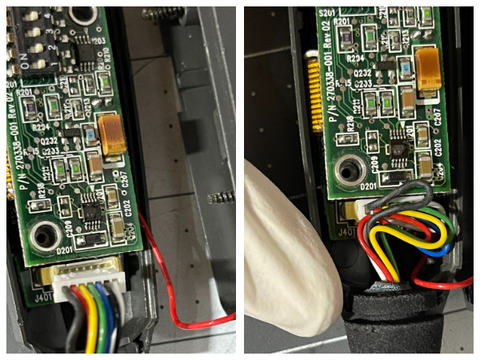
Carefully lift up the control module cover. While doing so, make certain to not remove it entirely, or break the battery lead wires that are connected to the circuit board. Using your X-Acto knife carefully cut away any hardened hot glue that you see on the white 7-wire connector so that you can disconnect the old down cable wire harness from the circuit board.
Step: 4 Install the new down cable
Insert the white wire connector into the receptacle found on the circuit board (the two small locking tabs should be facing the back of the receptacle). Ensure that the red battery lead wire is twisted around the 7-wire harness. Next, insert and position the strain relief into the control module housing as shown. Make sure to position the wires so that the cover can be installed without crimping any of the wires. You will need to fold the wires.
Step 5: Install the cover
Finally, reposition the cover and hold it in place with one hand while you reinstall the 2 screws with the other. Reinstall the retainer ring on the housing and the battery cover.